【Unity】GraphViewで遊んでみた。【第二回】
- はじめに
- 自己紹介
- Nodeの作成
- Nodeの状態とContainerの位置の情報
- Port同士を繋げられるようにする。
- ノードを作成するメニューを表示させる。
- Nodeの形状や配置を変える。
- 少し形状に手を加えた例。
- ここまでの成果
はじめに
この記事は第二回になります。Windowの作成方法などは第一回をご覧ください。
執筆日は20222/11/09になります。
Unityのバージョンは2021.3.1f1を使用しています。
自己紹介
活動名はHiruko、もしくはHirukoTimeで活動してます。
個人でSteamでゲームを販売したり、定期的にゲームジャムなどに参加をしています。
Nodeの作成
ベースとなる抽象クラスの作成
BaseNode.cs
using UnityEditor.Experimental.GraphView;
using UnityEditor.UIElements;

public abstract class BaseNode : Node
{
    //DefaultのUXMLでいい場合はこちらを使う
    protected BaseNode() : base() {}
    //OriginalのUXMLにしたい場合はこちらを使う
    protected BaseNode(string path) : base(path){}
}
適当にShaderGraphにあるNodeを参考に作る
FloatNode.cs
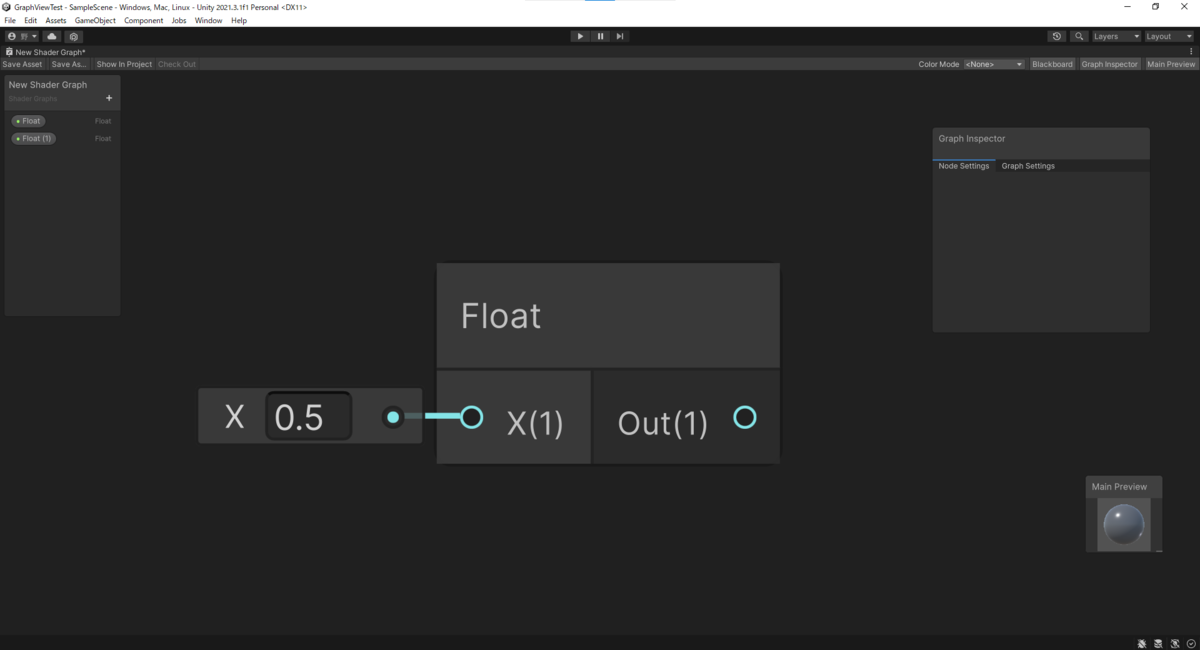
using UnityEditor.Experimental.GraphView;
using UnityEditor.UIElements;

public class FloatNode : BaseNode
{
    public FloatField Value { get; private set; }

    public FloatNode() : base()
    {
        base.title = "Float";


        //Orientation:ポートからでる線(Edge)の向き。Vertical、Horizontal
        //Direction:ポートの入出力の向き。Input、Output
        //Capacity:ポートに繋げられるEdgeの数。Multiは制限なし、Singleは1つだけ
        //Type:ポートのType
        //base.InstantiatePortは
        //Port.Create<Edge>(orientation, direction, capacity, type)を使っても同じ
        //内部で同じことしてる。
        var input
            = base.InstantiatePort(
                Orientation.Horizontal,
                Direction.Input,
                Port.Capacity.Multi,
                typeof(float));

        //Portの横に出るラベルの設定。
        //Port.titleではなくPort.portNameを使う。前者はエラーが出るので注意
        input.portName = "X(1)";

        //Direction.InputのPortはinputContainer、
        //Direction.OutputのPortはoutputContainerに入れる。
        inputContainer.Add(input);

        var output
            = base.InstantiatePort(Orientation.Horizontal, Direction.Output, Port.Capacity.Multi,typeof(float));

        output.portName = "Out(1)";

        outputContainer.Add(output);

        //一応、Floatの入力フィールドを作って置く。
        //extensionContainerはパラメーターなどのVisualElementを配置するのに使うっぽい。
        Value = new FloatField(){name = "Value",label = "Value"};
        extensionContainer.Add(Value);

        //extensionContainerはデフォルトの仕様だと閉じた状態でノードが生成される。
        //開いた状態にしたい場合は↓を2回呼ぶ。1回だとPortのContainerも閉じた状態になる。
        //もっと綺麗な方法がありそうではあるが見つかりませんでした。
        //base.ToggleCollapse();
        //base.ToggleCollapse();
    }
}
ShaderGraphのノード
 今作ったノード
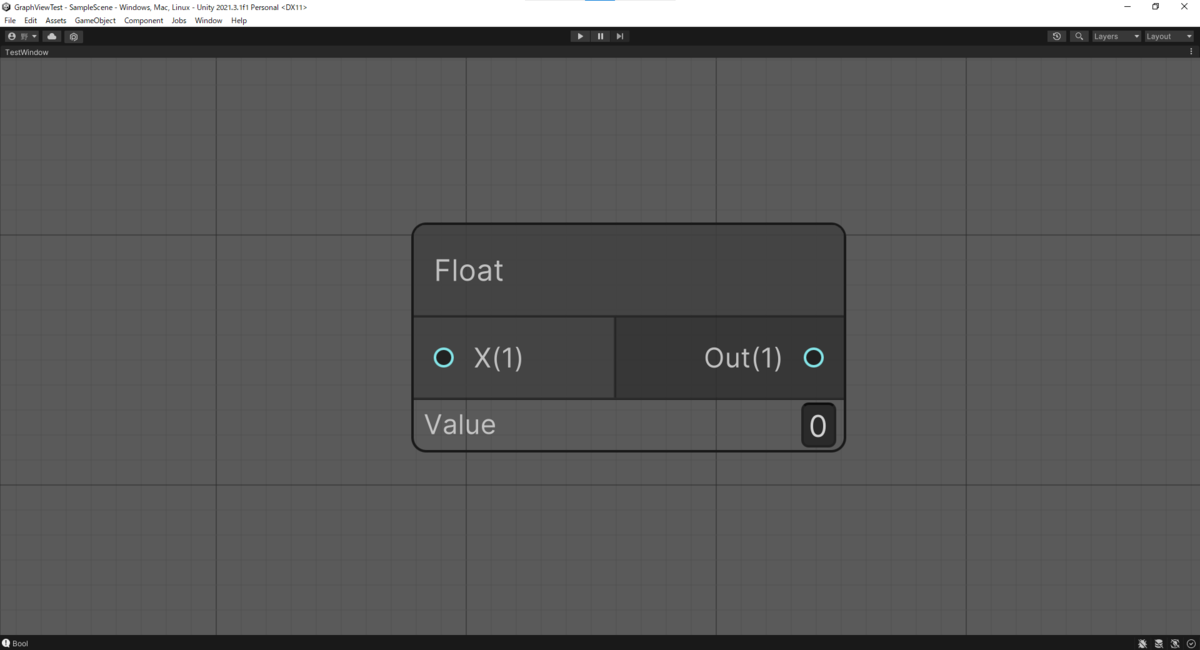 比べると見た目だけでも色々違いますが今はこれで保留。
Nodeの状態とContainerの位置の情報
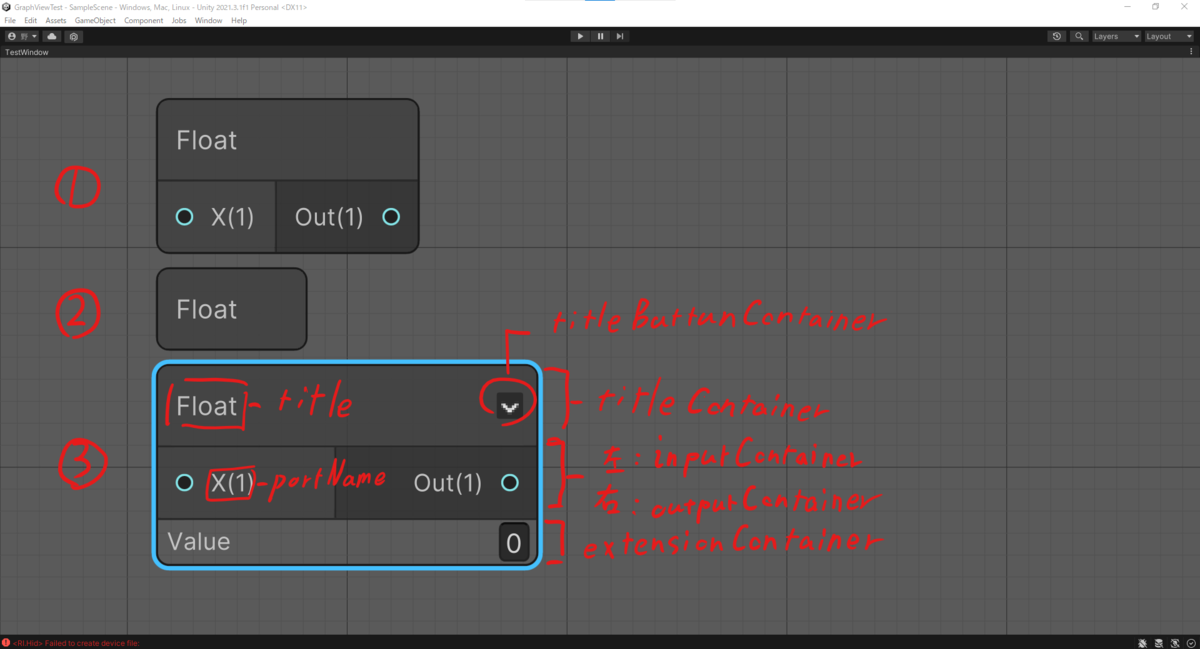
- Defaultの状態
- ToggleCollapse()が1回の状態(ノード上の【V】みたいなボタンを1回押した状態)
- ToggleCollapse()が2回の状態(ノード上の【V】みたいなボタンを2回押した状態)
Defaultの状態は一度開閉するとその状態にならない。
Port同士を繋げられるようにする。
現状の状態だとPort同士を繋げられないので、それを繋げられるようにする。
TestGraphView.cs
//省略
using System.Collections.Generic;//追加
using System.Linq;//追加

public class TestGraphView : GraphView
{
    public TestGraphView(){}//前回の最後に表示したNode追加部分は消してある。

    //ドラッグしてるPortと繋げられるPortを探す処理。どこからか呼ばれてる。
    public override List<Port> GetCompatiblePorts(Port startPort, NodeAdapter nodeAdapter)
    {
        var compatibleParts = new List<Port>();
        compatibleParts.AddRange( ports.ToList().Where(port =>
                startPort.node != port.node &&
                port.direction != startPort.direction &&
                port.portType == startPort.portType));

        return compatibleParts;
    }
}
GetCompatiblePortsがどかからか呼ばれて、Portをドラッグすると繋げられるようになります。
ノードを作成するメニューを表示させる。
メニュー作成するScripatableObjectを作成する。
SearchMenu.cs
using System;
using System.Collections.Generic;
using UnityEditor;
using UnityEditor.Experimental.GraphView;
using UnityEngine;
using UnityEngine.UIElements;

public class SearchMenu : ScriptableObject , ISearchWindowProvider
{
    private GraphView _graphView;
    private EditorWindow _window;

    private readonly List<SearchTreeEntry> _entries = new List<SearchTreeEntry>();

    public void Initialize(GraphView graphView, EditorWindow editorWindow, params Type[] notInserts)
    {
        _graphView = graphView;
        _window = editorWindow;

        _entries.Add(new SearchTreeGroupEntry(new GUIContent("Create Node")));
        _entries.Add(new SearchTreeGroupEntry(new GUIContent("Input")){level = 1});
        _entries.Add(new SearchTreeEntry(new GUIContent(nameof(FloatNode)))
             { level = 2, userData = typeof(FloatNode) });
    }

    public List<SearchTreeEntry> CreateSearchTree(SearchWindowContext context) => _entries;

    public bool OnSelectEntry(SearchTreeEntry searchTreeEntry, SearchWindowContext context)
    {
        var type = searchTreeEntry.userData as Type;
        if (type == null || !(Activator.CreateInstance(type) is BaseNode node)) return false;

        var worldMousePos
            = _window.rootVisualElement.ChangeCoordinatesTo(
                    _window.rootVisualElement.parent,
                    context.screenMousePosition - _window.position.position);

        var localMousePos = _graphView.contentViewContainer.WorldToLocal(worldMousePos);
        node.SetPosition(new Rect(localMousePos, new Vector2(100, 100)));

        _graphView.AddElement(node);
        return true;
    }
}
ScriptableObjectである必要性に疑問を感じたが、呼び出しにScriptableObjectであることが必要っぽい。
TestGraphView.cs
//省略
using UnityEditor;//追加

public class TestGraphView : GraphView
{
    public TestGraphView(){}//省略

    public override List<Port> GetCompatiblePorts(Port startPort, NodeAdapter nodeAdapter){}//省略

    //追加
    public void InitializeMenuWindow(EditorWindow window)
    {
        var menuWindow = ScriptableObject.CreateInstance<SearchMenu>();
        menuWindow.Initialize(this, window );

        nodeCreationRequest += context =>
        {
            SearchWindow.Open(new SearchWindowContext(context.screenMousePosition), menuWindow);
        };
    }

}
TestWindow.cs
//省略

public class TestWindow : GraphViewEditorWindow
{
    [MenuItem("Window/Test")]
    private static void ShowWindow(){}//省略

    private void OnEnable()
    {
        var graphView = new TestGraphView();
        graphView.InitializeMenuWindow(this);//追加
        rootVisualElement.Add(graphView);
    }
}
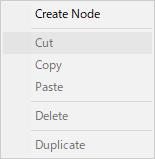
entries.Add(new SearchTreeGroupEntry(new GUIContent("Create Node")))
右クリックメニューの一番上にCreate Nodeが追加される
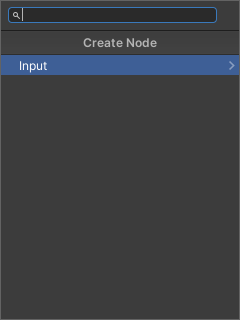
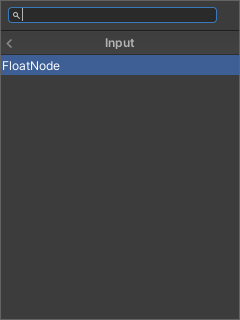
entries.Add(new SearchTreeGroupEntry(new GUIContent("Input")){level = 1});
右クリック>[Create Node]でこのメニューが出る。
_entries.Add(new SearchTreeEntry(new GUIContent(nameof(FloatNode)))
{ level = 2, userData = typeof(FloatNode) });
右クリック>[Create Node]>[Input]でこのメニュー。
FloatNodeをクリックすると、FloatNodeを生成できる。
各項目のlevelは適切に設定しないとその項目が行方不明になるので注意。
Nodeの形状や配置を変える。
元になるNodeのConstructorで以下のUXML要素が呼ばれているので、独自のUXMLを適用する場合は最低限必要になる。
例:"UXML内Name"[変数名]
"node-border" [mainContainer] public get ; private set;
"selection-border" [変数名無し]
"input" [inputContainer] public get ; private set;
"output" [outputContainer] public get ; private set;
"collapsible-area" [m_CollapsibleArea] private
"extension" [exntensionContainer] public get ; private set;
"title" [titleContainer] public get ; private set;
"title-label" [m_TitleLabel] private
"title-button-container" [titleButtonContainer]public get ; private set;
"collapse-button" [m_CollapseButton]private
MyNode.uxml(デフォルトの構成)
<?xml version="1.0" encoding="utf-8"?>
<engine:UXML xmlns:engine="UnityEngine.UIElements"
             xmlns:ui="UnityEngine.UIElements"
             xmlns:editor="UnityEditor.UIElements" >
    <ui:VisualElement name="node-border">
        <ui:VisualElement name="title" >
            <ui:Label name="title-label" />
            <ui:VisualElement name="title-button-container">
                <ui:VisualElement name="collapse-button">
                    <ui:VisualElement name="icon" />
                </ui:VisualElement>
            </ui:VisualElement>
        </ui:VisualElement>
        <ui:VisualElement name="contents">
            <ui:VisualElement name="divider" class="horizontal" />
            <ui:VisualElement name="top">
                <ui:VisualElement name="input" />
                <ui:VisualElement name="divider" class="vertical" />
                <ui:VisualElement name="output" />
            </ui:VisualElement>
            <ui:VisualElement name="collapsible-area">
                <ui:VisualElement name="divider" class="horizontal" />
                <ui:VisualElement name="extension"/>
            </ui:VisualElement>
        </ui:VisualElement>
    </ui:VisualElement>
    <ui:VisualElement name="selection-border" picking-mode="Ignore"/>
</engine:UXML>
MyUniqueNode.cs
using UnityEditor.Experimental.GraphView;
using UnityEditor.UIElements;

public class MyUniqueNode : BaseNode
{
    public MyUniqueNode() : base("Assets/GraphViewTest/Resources/MyNode.uxml")
    {
        //Defaultのスタイルを設定する
        //"selection-border"の色が変わるStyleとなどが含まれるため、
        //適用しないと選択時に色が変わらなくなる。
        UseDefaultStyling();

        //なんか独自の要素とか処理
    }
}
少し形状に手を加えた例。
ここまでの成果
ScriptのリロードやEditorのPlayをするGraphがなくなる(保存されてない)
右クリック>[Delete]やDeleteキーから削除はできるが、Paste、Duplicateはできない。
第三回の予定
Graphの保存
